*This article is for informational purposes only. Always consult your veterinarian before introducing any mobility aid to your dog's routine.
Getting a dog wheelchair for the first time is a big moment. But here's what most owners don't realise until it's too late: buying the right wheelchair is only half the job. A poorly fitted wheelchair — even an expensive one — can cause discomfort, limit your dog's movement, and make the whole adaptation process much harder than it needs to be.
The good news? Getting the fit right is completely achievable at home. This guide walks you through the three steps most owners skip, and shows you exactly how to measure your dog and check the fit before your dog takes their first roll.
Why Fit Matters More Than Size
Most people approach wheelchair sizing the way they'd shop for a dog bed — they look at their dog's breed and approximate weight and pick accordingly. That's a reasonable starting point, but it misses something important: two dogs of the same breed can require completely different fittings.
A Dachshund and a Labrador both come in a range of sizes. Body shape, leg length, and torso width all vary significantly even within the same breed. A wheelchair that's too wide will let your dog's body shift sideways, reducing stability. One that's set too high or too low will put the spine at an unnatural angle — and your dog will know immediately that something isn't right.
The three measurements that actually determine fit are height, length, and width. Here's how to take each one correctly.
The 3 Measurements You Need to Take
Before you touch the wheelchair, you'll need a soft measuring tape and ideally a second person to keep your dog calm and standing still. If your dog's hind legs are fully paralysed and standing isn't possible, you can take all three measurements with your dog lying on their side on a flat surface — just keep the body as straight as possible and ensure the legs are extended naturally, not tucked in.
Measurement 1: Height (Withers to Ground)
What to measure: From the ground straight up to the top of your dog's shoulder — this point is called the withers, and it's the highest point of the shoulder blade when your dog is standing naturally.
How to do it: Have your dog stand on a flat surface. Place the tape at the floor directly below the withers and measure straight up. Don't follow the curve of the leg.
Why it matters: This measurement sets the wheel height. If the wheels are too low, your dog's hindquarters will drag. Too high, and the harness will lift their rear off the ground unnaturally.
Common mistake: Measuring while the dog is sitting or lying down. Always measure standing, on a flat surface.
Measurement 2: Length (Rear Thigh to Front Shoulder)
What to measure: From the centre of the rear thigh to the front of the shoulder, measured along the side of the body.
How to do it: Run the tape along your dog's side — not underneath — starting at the midpoint of the rear thigh and ending at the point where the front leg meets the shoulder.
Why it matters: This determines the frame length. A frame that's too short will bunch the harness up against the hindquarters. Too long, and there won't be enough support where your dog needs it.
Common mistake: Measuring from the base of the tail rather than the centre of the thigh. The thigh midpoint is the correct anchor — it's where the harness sits.
Measurement 3: Width (Widest Point of the Body)
What to measure: The widest part of your dog's body when viewed from above — usually the hips or the shoulders, depending on the dog's build.
How to do it: Run the tape across the widest point, keeping it level. For most dogs this will be across the hips; for broader-chested breeds it may be the chest.
Why it matters: Width determines harness clearance. You want enough room that the harness doesn't compress the sides of the body, but not so much that the frame extends far beyond your dog's natural outline.
Size Reference by Breed Type
Once you have your three measurements, use them alongside this general guide. Remember: measurements always take priority over breed suggestions.
|
Size |
Weight Range |
Breed Examples |
|
XXS |
Under 3 kg |
Chihuahua, Pomeranian, Yorkshire Terrier, Pekingese, Kittens |
|
XS |
3–7 kg |
Shih Tzu, Bichon Frise, Miniature Pinscher, Adult Cats |
|
XS (Long barrel) |
3–7 kg |
Dachshund, Corgi, French Bulldog, Basset Hound |
|
S |
7–14 kg |
Cavalier King Charles Spaniel, Beagle, Cocker Spaniel |
|
M |
14–22 kg |
Pitbull, Border Collie, Boxer, Bulldog, Springer Spaniel |
|
L–XL |
22–40 kg |
German Shepherd, Golden Retriever, Labrador, Standard Poodle |
Note: Dachshunds, Corgis, and French Bulldogs share a long barrel-chested body shape that requires a specific XS configuration — not the standard XS. If your dog is one of these breeds, make sure you're selecting the long barrel variant.
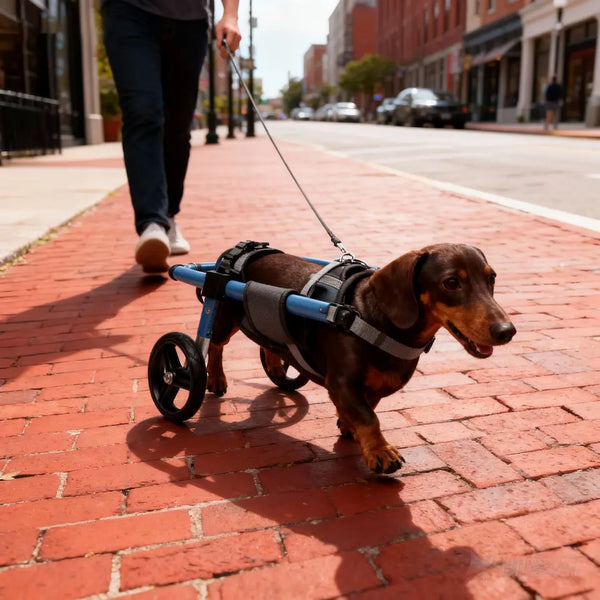
Fitting a Dachshund: What's Different
Dachshunds are one of the dog breeds most prone to problems due to wheelchairs not fitting properly.
The length measurement is the most critical. A Dachshund's body is significantly longer relative to their leg height than almost any other breed. This means a frame that's even slightly too short will bunch the harness against the hindquarters, and one that's too long won't provide support where the dog actually needs it. Take the rear thigh to front shoulder measurement carefully and don't estimate.
Wheel height has a bigger effect than you'd expect. Because Dachshunds sit lower to the ground — Standard Dachshunds have roughly 3 to 4 inches of belly clearance — even a small change in wheel height noticeably shifts the spine angle. The horizontal spine check (Step 1 below) matters more for Dachshunds than for any other breed. Don't skip it.
Width is usually less of an issue. Dachshunds are narrow through the hips and shoulders, so the XS long barrel frame typically provides the right clearance without needing significant adjustment. If in doubt, err toward fitting closer rather than wider — a frame that extends well beyond your dog's body outline reduces the stability they need when learning to push forward.
If you have a Dachshund, our Complete Dachshund Wheelchair Guide covers frame sizing, the XS vs S decision, and what the first week typically looks like.
The 3 Steps Most Owners Miss
Getting the measurements right is the foundation. But these are the three fitting steps that owners most commonly skip — and they make a significant difference to how your dog experiences the wheelchair.
Step 1: Check the Spine Is Horizontal
Once the wheelchair is on your dog, stand back and look at them from the side. The spine should be level — completely horizontal from shoulders to hips.
If the rear end is tilting down, the wheels need to be raised. If the rear end is lifted up, the wheels need to be lowered. Many owners skip this check entirely and wonder why their dog seems reluctant to move forward — an uneven spine position is uncomfortable, and dogs respond to discomfort by resisting movement.
This is the single most important visual check you can do. For Dachshunds especially, a spine that's off by even a small amount is usually noticeable within the first minute of use.
Step 2: Verify the Hind Legs
Look at your dog's hind legs once the wheelchair is fitted. There are two correct configurations depending on your dog's mobility:
If your dog has some movement in their hind legs: leave the legs out of the foot slings. The goal is to encourage whatever natural motion remains. Placing functioning legs in slings works against this.
If your dog has no movement in their hind legs: use the foot slings to keep the paws elevated. This prevents the paws from dragging on the ground and causing skin irritation.
The foot slings are fully removable from the frame — take them off entirely if they aren't needed.
Step 3: Test the Buckle Clearance
The rear harness should sit snugly without compressing the body. Run two fingers between the harness and your dog's body — if you can fit two fingers comfortably, the fit is correct. If you can fit more than three, tighten it slightly. If you can barely fit one, loosen it.
The 10-second quick-release buckle system makes adjustments easy — you should be able to get your dog in and out of the wheelchair smoothly from day one.
Signs the Fit Needs Adjusting
Even after initial setup, watch for these signals during the first few sessions:
|
What You See |
What It Means |
|
Dog's rear end tilting downward |
Wheels set too low — raise the height |
|
Dog's rear end lifted unnaturally |
Wheels set too high — lower the height |
|
Dog moving sideways or crabbing |
Frame width needs adjusting |
|
Dog seems reluctant to move forward |
Check spine is horizontal; harness may be too tight |
|
Harness sliding backward during use |
Frame length may need extending |
|
Red marks on skin after use |
Harness is too tight at that point — adjust or add padding |
Most fit issues resolve with small adjustments. The wheelchair frame is fully adjustable for height, length, and width — take your time in the first week to dial it in.
How Long Until the Fit Feels Natural?
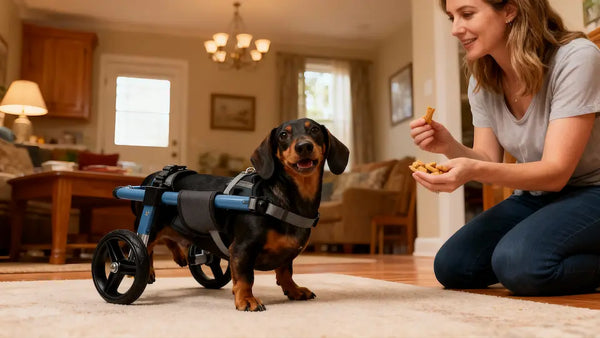
Most dogs take 3 to 7 days to feel genuinely comfortable in their wheelchair. During this time, some resistance or hesitation is completely normal — your dog is learning to navigate with extra weight and a new frame around their body.
Start with short sessions of 15 to 20 minutes and increase gradually. By the end of the first week, most dogs have developed a clear sense of where their wheels are and begin moving with noticeably more confidence.
For a day-by-day breakdown of what to expect in week one, visit our First Week in Wheels guide.
Frequently Asked Questions
Q: Can I adjust the wheelchair as my dog's needs change over time?
Yes. All wheelchairs feature adjustable height, length, and width settings. The rear-support model can also be upgraded to full-body support by adding a front attachment — so the wheelchair adapts as your dog's requirements evolve rather than needing to be replaced.
Q: What if my dog is between sizes?
Always go by your measurements rather than defaulting to the larger size. If your dog is genuinely between two sizes, contact us directly — we can advise on which configuration works better for your dog's specific body shape.
Q: How do I know if the height is set correctly?
The clearest indicator is the spine. When viewed from the side, the spine should be perfectly horizontal. If it isn't, adjust the wheel height until it is.
Q: I have a Dachshund — do I need a different size or configuration?
Dachshunds use the XS long barrel configuration, which is adjusted for their longer body relative to their leg height. The key measurements are the same as for any other dog, but the length measurement matters more for Dachshunds than most breeds. Our Dachshund Wheelchair page walks through exactly which frame suits Miniature vs Standard Dachshunds and what to look for during the first fitting.
Q: Can my dog use the wheelchair straight away or do they need to build up gradually?
Build up gradually. Start with 15 to 30 minute sessions and increase duration based on your dog's energy and comfort. Most dogs are comfortably using the wheelchair for 2 to 4 hours per day within two to three weeks.
Q: Where can I find the full measuring instructions with diagrams?
Visit our Measuring Guide for illustrated step-by-step instructions and the complete size chart.
Ready to Get the Fit Right?
A well-fitted wheelchair makes an immediate difference to how your dog moves and how quickly they adapt. Take the three measurements, check the spine position, verify the leg configuration, and test the harness clearance — those steps alone put you ahead of most first-time wheelchair owners.
If you're still deciding on the right wheelchair for your dog's size and needs, our full wheelchair range includes options from XXS to XXL, with configurations for rear support, full-body support, and front leg attachment.
For detailed measuring diagrams and the complete size chart, visit our Measuring Guide.